Friday, October 30, 2009

Better than Auntie Anne's!

Or whatever that pretzel shop is at the mall. I made homemade soft pretzels, and they were gooood!

I feel like all I've been writing about lately is food and new recipes. For some reason, I've been really into baking and cooking lately. I even have 4 new dinner recipes I want to try next week! Don't worry, though, I'm not forgetting about the other stuff on my list, but I just feel like it's not as fun to write about.
But just to let you know...I have completed #36: Apply for Financial Aid for School. I have also completed #48: Buy a new door for our bedroom. And also part of #77: Get my hair highlighted once a year. But what else can I say about those, you know?

Also, I have been taking my multivitamin every day. I still go to the gym at least 3 times a week, but with this running program I've been doing, it's more like 6 days a week. Etc. etc. etc.

So now for something more fun, I made homemade soft pretzels!

Seeeeee.


They're so pretty.

I put sea salt on half of them:


And a cinnamon-sugar mixture on the other half:


I found this recipe online, and realized that I already had all the ingredients at home already! That's always nice. So, I went home and made the dough right away!

Ingredients:
3 1/2 cups flour
4 tbsp. brown sugar
2 tsp. salt (sea salt preferably)
1 tbsp. yeast-dissolved in water
1 cup water--warm, but not hot
1 tbsp. baking soda mixed with 1 cup of boiling water
1 egg beaten with 1 tsp. water

Directions:
Mix water, yeast, brown sugar, and salt in a mixing bowl. Add flour until dough is smooth. If the dough is sticky, add more flour.

If you can, let the dough sit overnight in the fridge.

Then, take the dough, and divide it into pieces. I divided mine into 9 pieces, and the pretzels were a good size I though. If you want them bigger, you can divide the dough into less pieces. If you want them smaller, you can divide the dough into more pieces.

Roll each piece into a thing rope. I had trouble with this step, and I felt my ropes weren't too thing, and my pretzels still turned out fine. So, if you're worried your ropes of dough aren't 'thin' enough, don't worry!

Then, shape the dough into an upside-down U shape on your surface, twist the ends and bring them down to the bottom of the pretzel. (Hope that makes sense!)

Place the pretzels on a greased cookie sheet, and let rise for 30 minutes.
Next, either brush each pretzel with the baking soda-water mixture. However, if you want a chewier crust, put 2 tbsp. baking soda in 4 cups of boiling water and drop the pretzel in that mixture for a few seconds and then take it out with a pancake-turner thing with slots in it, so the water can drain out. I did this option, because I wanted chewier crust.

Then, brush each pretzel with the egg-water mixture. This will put a nice shiny glaze on the pretzel.

Sprinkle each pretzel with sea salt, or whatever you want to top them with. (I did half sea salt and half cinnamon-sugar) and bake in the oven at 425 degrees for 12-15 minutes. Or until browned.

And enjoy! Yum!

And because tomorrow is Halloween, I'll leave you with some pictures of the Halloween-shaped shortbread cookies I made last week!
Thursday, October 29, 2009

Andddd we have a winner! (bread related)

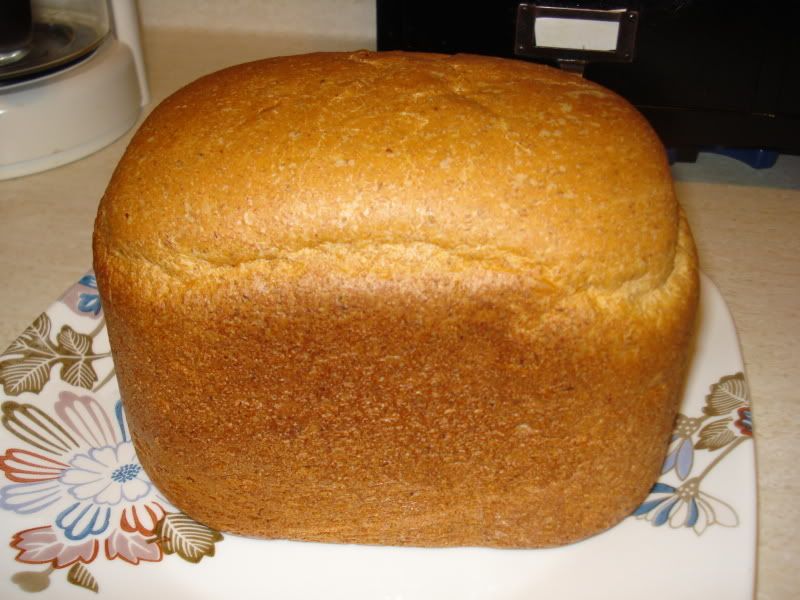
It seems that we have found a great bread recipe, after trying a few! This one did everything we wanted it to--it rose well, without sinking in at the top, it didn't get the bread-kneader thing stuck in it when I took it out of the pan, it made nice BIG slices, and most importantly, it tastes good!

Here is the wonderful recipe:

Ingredients:
1 cup warm water
1 packet yeast (I think that's 2 1/4 tsp?)
2 tbsp honey
1/4 cup vegetable oil
1 1/2 cups whole wheat flour
1 1/2 cups bread flour
1/4 cup flaxseed meal
1 1/2 tsp. salt

Directions:
Place water and yeast in bread pan and let it sit for 10 minutes.
Then, add the rest of the ingredients in the order listed.
Set bread machine to Basic bread; light crust setting.

Here's a couple things this recipe does differently, which I think makes the bread turn out better. First, it has me add the yeast directly to the water. I'm not an expert at bread baking, but I think a lot of recipes tell you not to let the yeast touch the wet ingredients. So I thought this step was weird, but it definitely worked! This recipe also had me adding more salt--which helps the bread rise more. And lastly, even though it's technically wheat bread, I should set my bread machine to the basic bread setting, not the wheat bread setting. The basic bread setting doesn't bake it as long as the wheat bread, which makes the crust not as hard.

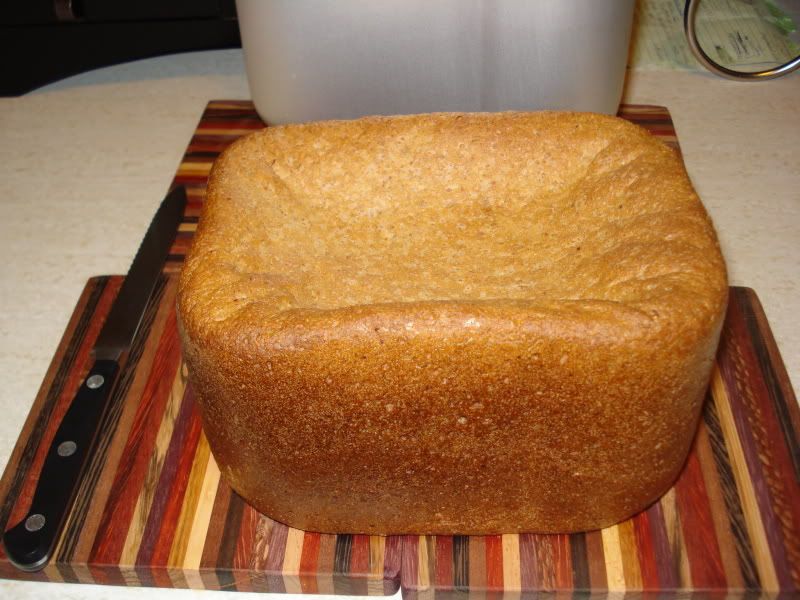
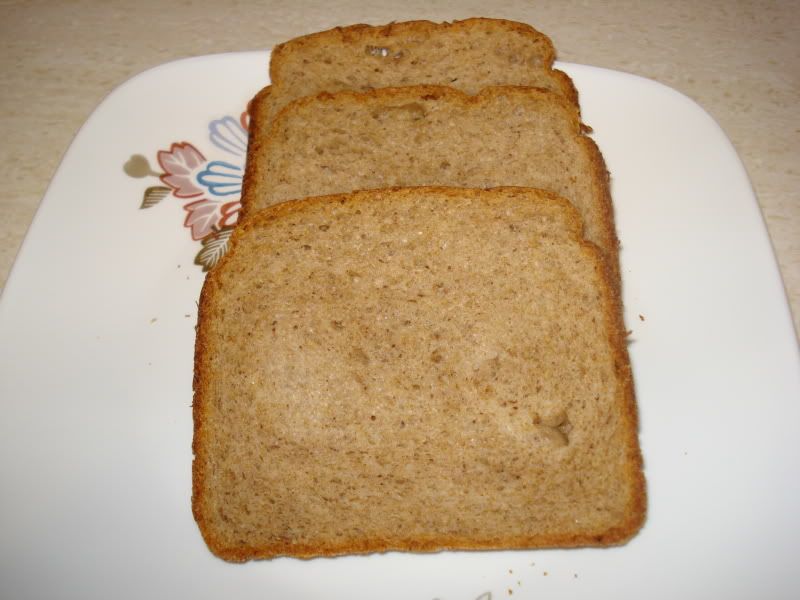
Now, here's some side-by-side pictures for your comparison to my last recipe:


See how the top actually rises? :) And here, it's sunken in. :(


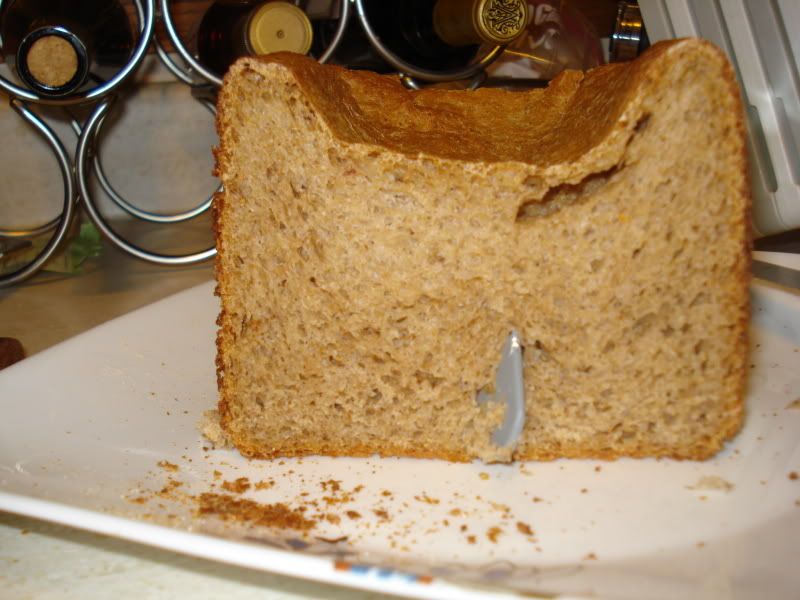
These pieces look normal. And these pieces don't. And the
kneader is stuck in there.


So there you have it. Good sandwich, and toasting bread.

Stay tuned...I will soon be posting aout my homemade soft pretzels I recently made and my Halloween shortbread cookies!

Wednesday, October 21, 2009

Peanut Butter Oatmeal Chocolate Chip cookies


I was making these cookies for Josh to bring to a church group that he's in. It turns out, however, that it wasn't actually his turn to bring the snack this week. Soooo, now we have a ton of cookies to eat ourselves. Not only did I make these cookies, but I also made some shortbread cookies for him to bring as well. That's for another post though. :)

I got this recipe from Krystal, who always has a ton of good recipes on her blog! I don't ever make cookies from scratch. Usually I just buy the dough and bake it. But I had some time on my hands, so I gave it a try. And it was very easy. And I got to use my big mixer!
Ingredients:
1/2 cup butter = 1 stick of butter
1/2 cup white sugar
1/3 cup packed brown sugar
1 cup peanut butter
1/2 teaspoon vanilla extract
1 egg
1 cup all-purpose flour
1 teaspoon baking soda
1/4 teaspoon salt
1/2 cup rolled oats
1 cup semi-sweet chocolate chips (I actually bought chocolate chunk pieces. You can also do 1/2 cup chocolate chips and 1/2 cup mini peanut butter cups)
Directions:
1. Preheat oven to 350 degrees.
2. In a medium bowl, cream together the butter, & sugars until smooth. Stir in the peanut butter, vanilla, and egg until well blended.
3. In a medium bowl, combine the flour, baking soda and salt and mix well. Stir into the batter until moistened.
4. Mix in the oats and fold the chocolate & peanut butter chips until evenly distributed. Using my cookie scooper by the tablespoon onto the cookie sheet.
5. Bake for 10 to 12 minutes in the oven, until the edges start to brown. Cool on cookie sheets for about 5 minutes before transferring to wire racks to cool completely.

Yield: 3 dozen cookies

I think the most amazing part may be that I actually made exactly 3 dozen cookies! Usually recipes say that it makes a certain # of cookies, and I get maybe 2/3 of that. But I actually got the right amount this time.
Enjoy!

Saturday, October 17, 2009

Bread Change-of-Heart

Sooooo, the morning after, the bread is a little better consistency. I think if I cut it thinner, it could be ok for sandwiches. And I think I could actually achieve cutting it thinner if I let it cool for a longer time before trying to cut it. I tried to cut it right away last night, mostly because I wanted to get that kneading thing out of it. But I think if I left it for a while, it would be easier to cut; therefore I could cut it thinner and possibly use it for sandwiches.

Andddd Josh really liked it as well! We had some for toast this morning and it was very good. It didn't crumble as much.

So the new plan is to try to make another loaf today. Let it sit before cutting it. And go from there.

I'll let you know how it turns out.

Friday, October 16, 2009

Breadmaker Bread

I've had my breadmaker for a while. But haven't used it in years. I decided to give making my own bread a try for a few reasons: to try and save money on bread, and because I love how my house smells while it's baking. I found a recipe that I liked and then went out and bought the ingredients. I even calculated how many loaves of this recipe (assuming I liked it) I could get from my ingredients to calculate my cost savings on bread.

Here's the breakdown:

King Arthur 100% Whole Wheat Flour $4.04--can get 12.67 loaves

King Arthur Bread Flour $4.04--can get 15.2 loaves

Flaxseed Meal $3.45--can get 17 loaves

Yeast--$.50 per packet--1 packet per loaf


That's all the stuff I had to buy. The recipe also called for honey, butter, water, and salt. But I had those ingredients so I did not include those in my costs.

I bought the 'King Arthur' brand of flour because I heard it was good for baking bread and it was on sale. (It's usually $6.50!). If I buy the Pillbury brand of flours (which I'd probably do next time)-- those were $2.55 each, so my cost saving would be more.

I took the amount I spend on ingredients minus the yeast--11.53--and divided it by the lowest number of loaves I'd get using up these ingredients--12--and it comes out to about $.96 per loaf. Add the yeast packet to that and it comes to $1.46 per loaf.

The bread I usually buy from the grocery store is the 100% Honey Whole Wheat by Sara Lee. That usually runs me about $3.30 a loaf. So, my cost savings per loaf is $1.84. I'd say that's pretttttty good.

But now let's get to the bread. I found this recipe online. I chose one with flaxseed because it adds more protein, fiber, and other gooood stuff.

Honey Whole Wheat and Flaxseed Bread

1 1/8 cups warm water (110 degrees)
1/4 cup honey, warmed in microwave
3/4 tsp. salt
1 1/2 cups whole wheat flour
1 1/4 cups bread flour
1/4 cup flaxseed meal
2 tbsp. melted butter
2 1/4 tsp. active dry yeast (1 packet)

Add ingredients to bread machine in the order written. Wheat cycle, light color setting. On my bread machine, the wheat setting takes 3 hours and 40 minutes.
And now here's my finished product.

Here's my first problem. Is the top of the bread supposed to be sunken in like that?


Here's the side view.


Here's the handy dandy bread machine bread cutter thing and electric knife, courtesy of the mother a long long time ago. Fortunately, I didn't throw either of these out, even though I'm sure I've thought about it before, as they take up room in my little cabinet space.


Here we are to problem #2. The thing inside the bread maker that kneads the dough and all that came out into my bread when I took my bread out. Does this always happen? It make it awfully difficult to cut once I got to this part.


And here is the sliced finished product. Even with the handy dandy bread machine bread cutter thing, it was a little difficult to slice the bread evenly.


And my one last complaint. I thought the crust of the bread was a little hard. Is it always like this? I feel that this bread wouldn't be good for sandwiches, which is what Josh and I use bread for the most. The crust is hard, and the inside is kind of crumbly. Therefore, my cost savings making bread over buying it might not come into play as I might have to go out and buy some bread now.

If you make bread--can you tell me if I did something wrong, or if this is what bread maker bread is usually like?

I did already eat a piece and it was definitely good, just not what I thought it was going to be.

Wednesday, October 7, 2009

It's amazing...I can see!

I found my old glasses today. I haven't worn them in probably about 6 or 7 years or so. I got them around the time of my freshman or sophomore year in college. I wore them for a while, but eventually stopped. The thing is that I don't remember them making that much of a difference. Well, I put them on today for fun, and OH MY GOSH. Everything was soooo much more clear! It was crazy. I don't remember that happening when I first got them. Maybe this means my eyes have gotten worse in the last 6 or 7 years. I'm not sure if I've even been to the eye doctor since I first got the glasses. Eye doctors scare me. I hate eyes and anything to do with the eyes, so I tend to stay away. But now, I suppose I'm going to have to go back. Which would complete #78: Go to the eye doctor again. I was secretly hoping that was going to be one item I didn't complete. But it was amazing how much clearer everything was with the glasses. I can't go back to normal now. I just need cooler frames. I think mine are a little outdated. That's what Josh says anyway.

Here is me without glasses (I feel this picture makes my face look kind of blotchy--it's not really like that!)


And here's me with the glasses.


I'm thinking of getting some glasses with the wider frames when I get some. Let me know what you think.